|
|
|
 |
 |
 |
|

|
 |
Map Key:
A, B, C, D, E, F, G - Frontier Keep. These keeps control
a strategic point and serve as a focus point for Realm vs. Realm Conflict.
a, b, c, d, e, f, g - Tower. These tower locations control chokepoints,
passes, and approaches to the Frontier Keeps.
1 - Coastal Island keep. The bridges to the keep provide quick access
in and out. The area directly to the sides of each bridge is impassable (in
order to force groups to commit to taking a bridge or water route). The rest
of the coastline around that keep is flat beach to allow for clear visibility
when assaulting the island. This keep is of strategic importance, since it
must be held in order to maintain a supply line to keeps in other frontiers.
2 - Northern Coast. The beach head immediately in front of the keep is
flat, allowing for a safe landing with good visibility (and consequently, into
guard aggro). The area away from the keeps has the hill with the lip that
prevents visibility until you're all the way up to the top. The coast is
dotted with steep areas that are not entirely climbable.
3 - Eastern Coast area. The beach head immediately in front of the keep
is flat, allowing for a safe landing with good visibility (and consequently,
into guard aggro). The area away from the keeps has the hill with the lip that
prevents visibility until you're all the way up to the top.
4 – Flat Mountain Supply Road. This road starts on the east side of
the mountains with a ramp that offers defenders easy access to the top of the
eastern mountain. This mountain offers excellent positioning to attack enemy
forces that try to use the canyon as a quick path to the relic wall. A rope
bridge can be used to cross to the west mountain. At the NW corner of the west
mountain is a one-way ramp that leads down from the mountain, right into the
area just behind the Siege Keep. This allows defenders a safe and quick route
to the keep, while the one-way ramp prevents attackers from using the same
route in reverse for a safe quick route into the inner frontier.
5 – Gnarled Woods. (Same idea as Midgard's Dark Woods.) This patch of
woods has been overrun with lots of thickly settled and angry creatures. This
serves as a disincentive for armies moving through the area. (The idea is that
a single person, and perhaps even a careful group, can slowly snake their way
through the woods to the other side, but any significant force would avoid
this area like the plague as they'd be bogged down indefinitely fighting all
the mobs that aggroed on them.)
6 – Rolling Hills. These are a series of rolling hills covered in
trees. The intention is to allow a certain ease of travel, yet limit line of
sight with hills and trees - creating opportunities for ambushes and
sudden/high speed meetings between forces.
7 – River Walls. Most of the river is surrounded by steep
non-climbable banks, forcing anyone traveling down there to commit to that
course of movement for a specific time. At various intervals, there will be
areas where players can climb up and get onto main land.
8 – Ancient Village. This area is made up of many old dilapidated
huts, buildings, and other items left over from a village that existed long
ago. The idea behind this area is that it will allow for good close quarters
fighting, and interesting games of cat and mouse between small groups and
individuals. It would take a large force a significant amount of time to
search all the various nooks and crannies in the area, so it can also serve as
a safe haven from enemy armies.
9 – Mountain Trail. This tree-lined trail is a Celt-made pass carved
through the mountain. Protected by a guard tower on each side, the intention
of this trail is to allow easy reinforcement from the Keep F to Flat Mountain
and on to Keep D.
10 - Center Island Keep. This keep has three bridges providing fast
access leading to it. Directly on both sides of the bridges are impassable
areas. The rest of the coast line north of the two bridges (the direction the
keep faces) is flat beach to allow for clear visibility when assaulting the
island. The rest of the island has the hill with the lip that prevents
visibility until you're all the way to the top.
11 – Steamy Bog. This area is a marshy, swampy or slushy area that
slows movement. This is to act as a disincentive to movement through the area.
12 – Moonlight Hill. This is a nice hill that provides excellent
(some may even say romantic) view of the river edge and the ancient village.
This is a spot players will use as rally points for attacks or defenses.
13 – Relic Rapids.
These areas are blocked by an unbreakable
portcullis (that extends all the way to the bottom of the river), which
prevents all traffic through the relic gates.
14 - Border Keeps. The border keeps are where people zone into the
frontier from their homeland. These keeps are designed to allow access across
a wide area, both outside and inside the relic defense wall. This forces relic
raiders to blockade two areas to stop reinforcements during a relic raid.
15 - Merchant
Town. This area located in the relative safety behind the relic gate
walls is the Albion frontier town. The demand for supplies and services for
those fighting in Frontiers has allowed the town to prosper greatly and become
a full service town that provides just about anything your heart could desire.
Trainers, merchants, crafting tables; you name it, it's here. However, the
merchants in this town must be protected, and if the town is ransacked by
enemy forces, it may take a while before the townspeople work up the nerve to
return to their duties.
Legend Definitions
Relic Gates. These gates protect the relic keeps. Much
like the existing mile gates, these will have a single door that serves as a
bottleneck. The area between and on each side of the gates is an impassable
wall forcing people to move through the gates. Currently during relic raids,
there are generally two battles. One battle that happens at the keep itself,
and then a second battle that happens at the mile gates as all three realms
battle in a last ditch attempt to stop the relic from escaping. This design
forces those two battles to happen closer together and lets defenders who are
not able to get inside the keep to defend, set up a defense at the gates.
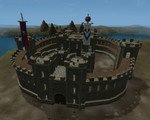
Keeps and Guard Towers. Each keep has four primary guard towers. In
addition to adding NPC guards to help the defender/attacker, and serving as an
early warning system of upcoming attacks, the guard towers are placed at
strategic points to attack or defend their associated keep. A smart keep siege
leader will do well to instruct her troops to take out one or more guard
towers before attacking a keep. Of course, a smart defense leader may have
some of her troops counterattack to reclaim the towers.
Mile gates. There are two mile gates guarding each of the relic keeps.
Relic Keeps. These keeps house the relics of the realm. |
 |
 |
 |
|
|
|
|
|